Deploying a Catalyst storefront
Before deploying your storefront, make sure to follow the Local Development documentation. Alternatively, ensure you already have the appropriate environment variables set up as well as a source code repository.
Environment Variables
Regardless of where or how you deploy your Catalyst application, you'll need to get an updated set of environment variables to use. Assuming you've already run your application locally, you can use the majority of the envrionment variables defined in your your env.local file. However, there are a couple of environment variables that need to be updated. Make sure to check the documentation for each one on how to update them accordingly.
For a full list of environment variables, refer to the environment variables documentation.
Deploying to Vercel
To deploy to Vercel, you'll need to first sign up or sign in to your Vercel account (opens in a new tab).
Using the Vercel dashboard
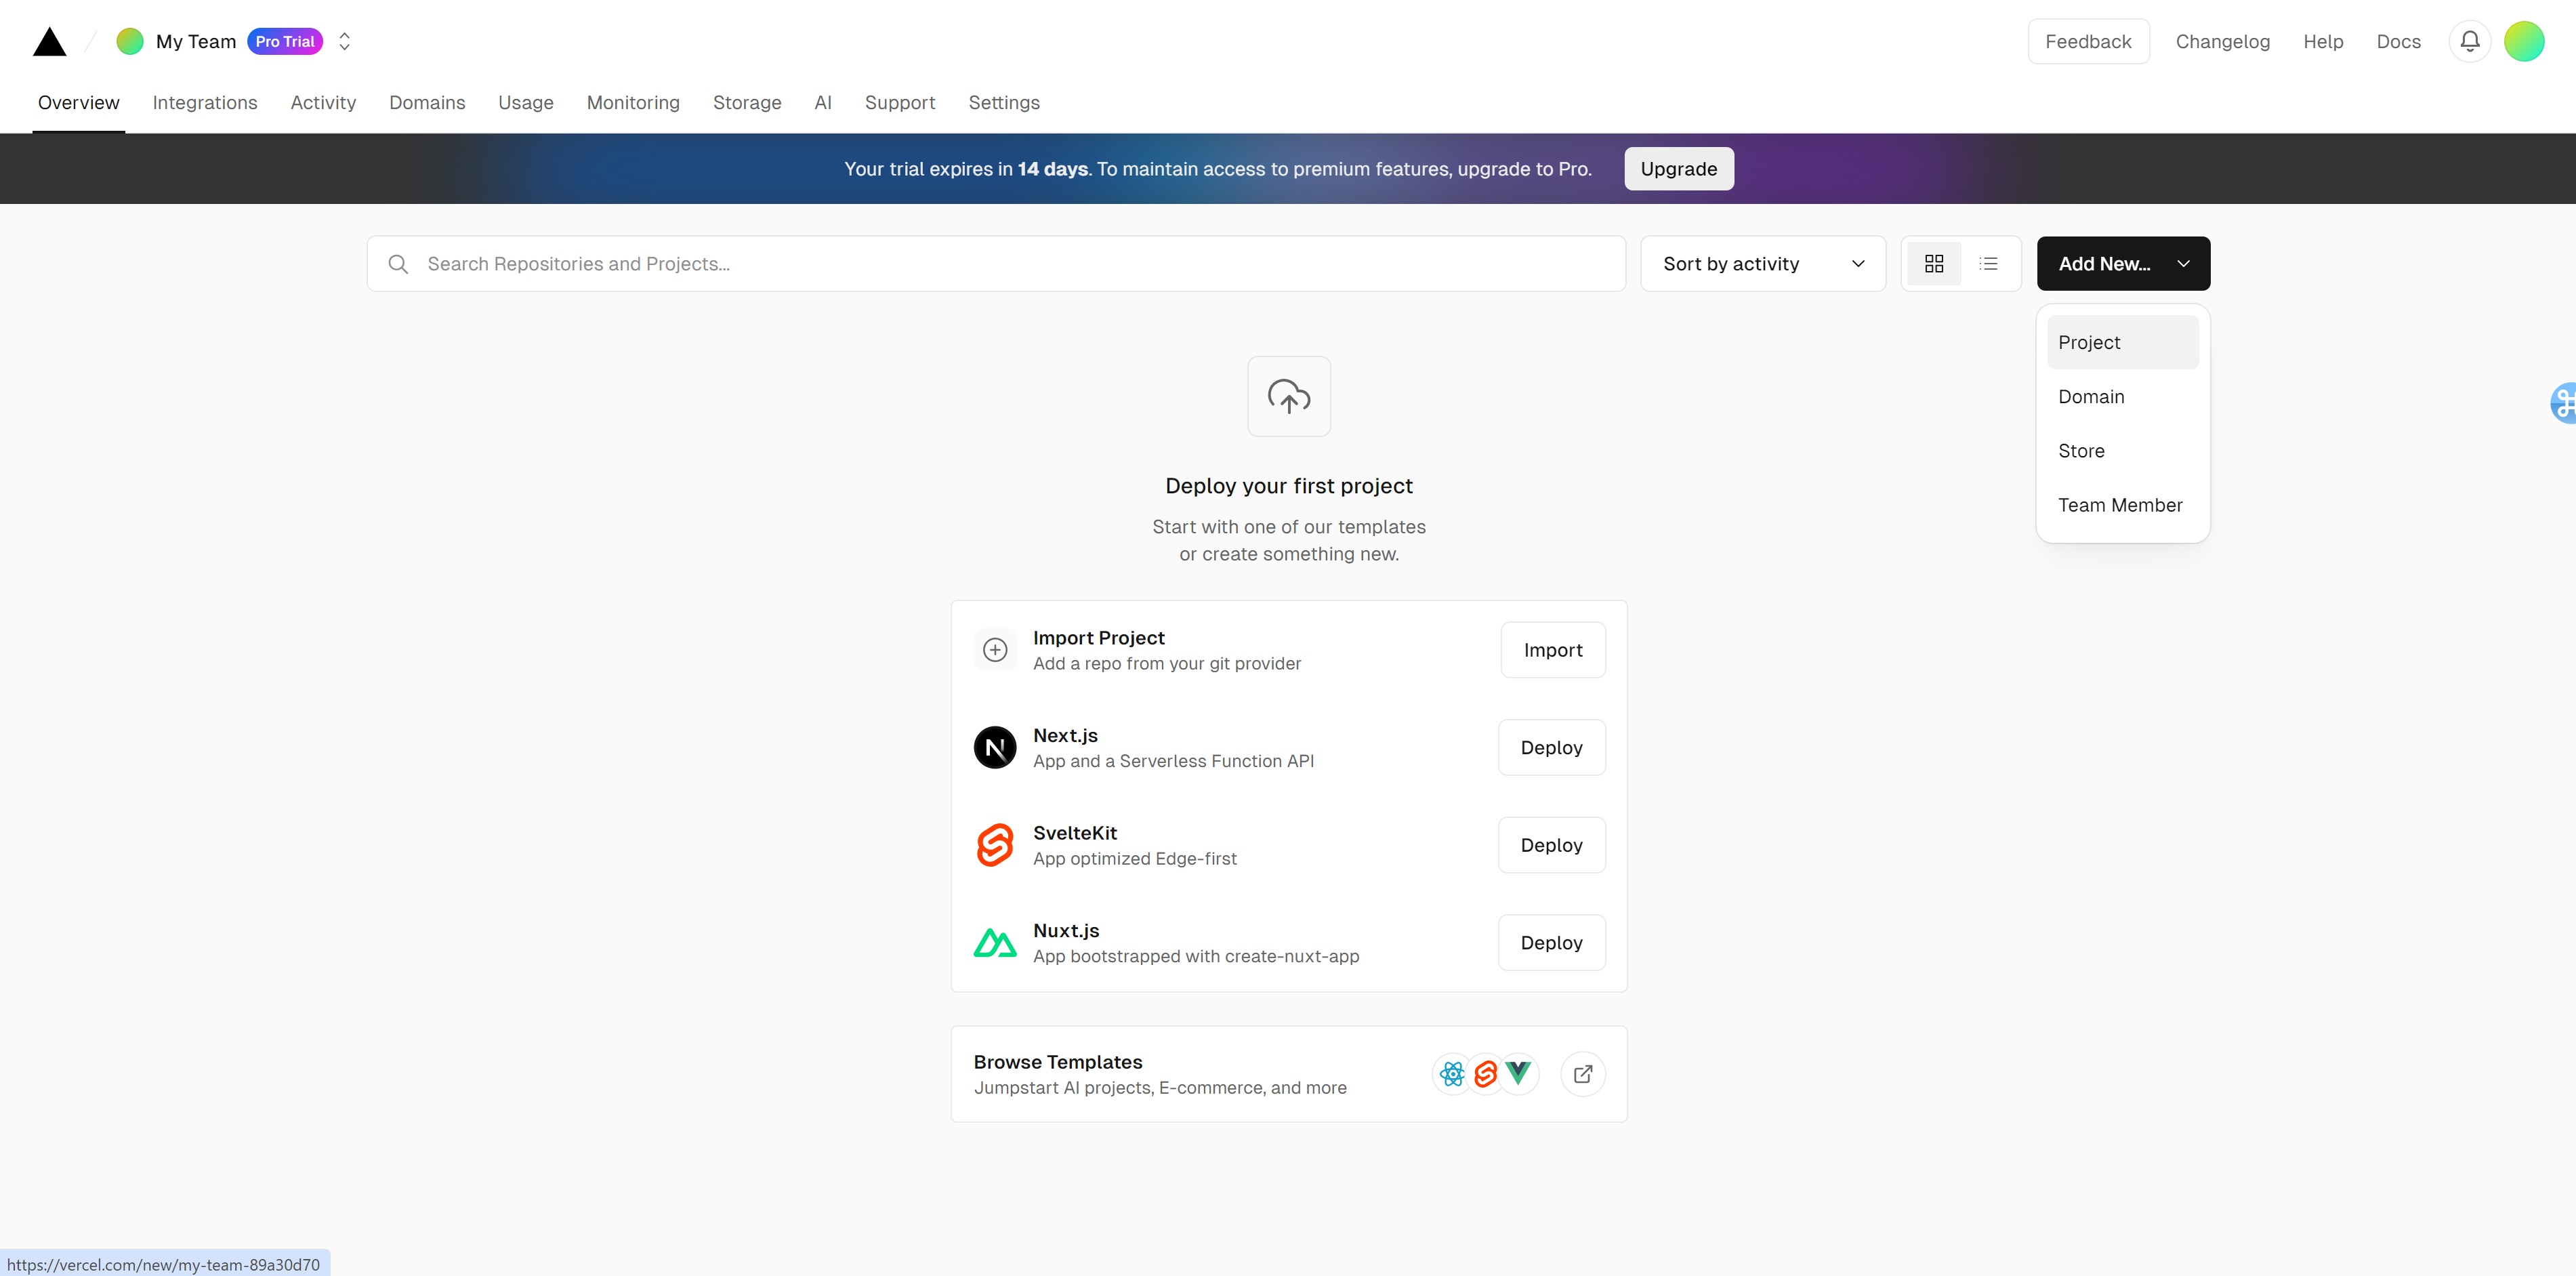
To deploy to Vercel using the Vercel dashboard, select Add New... > Project from the top right of the Overview page.
Then, connect to the GitHub, GitLab, or Bitbucket source repo that contains your Catalyst storefront's code.

Since we are deploying from a monorepo, we need to adjust some of the default Vercel deployment configuration. Update the following properties:
- Framework Preset - Next.js
- Root Directory - click Edit and select the
core/folder.
You may leave the Build and Output Settings section as-is.
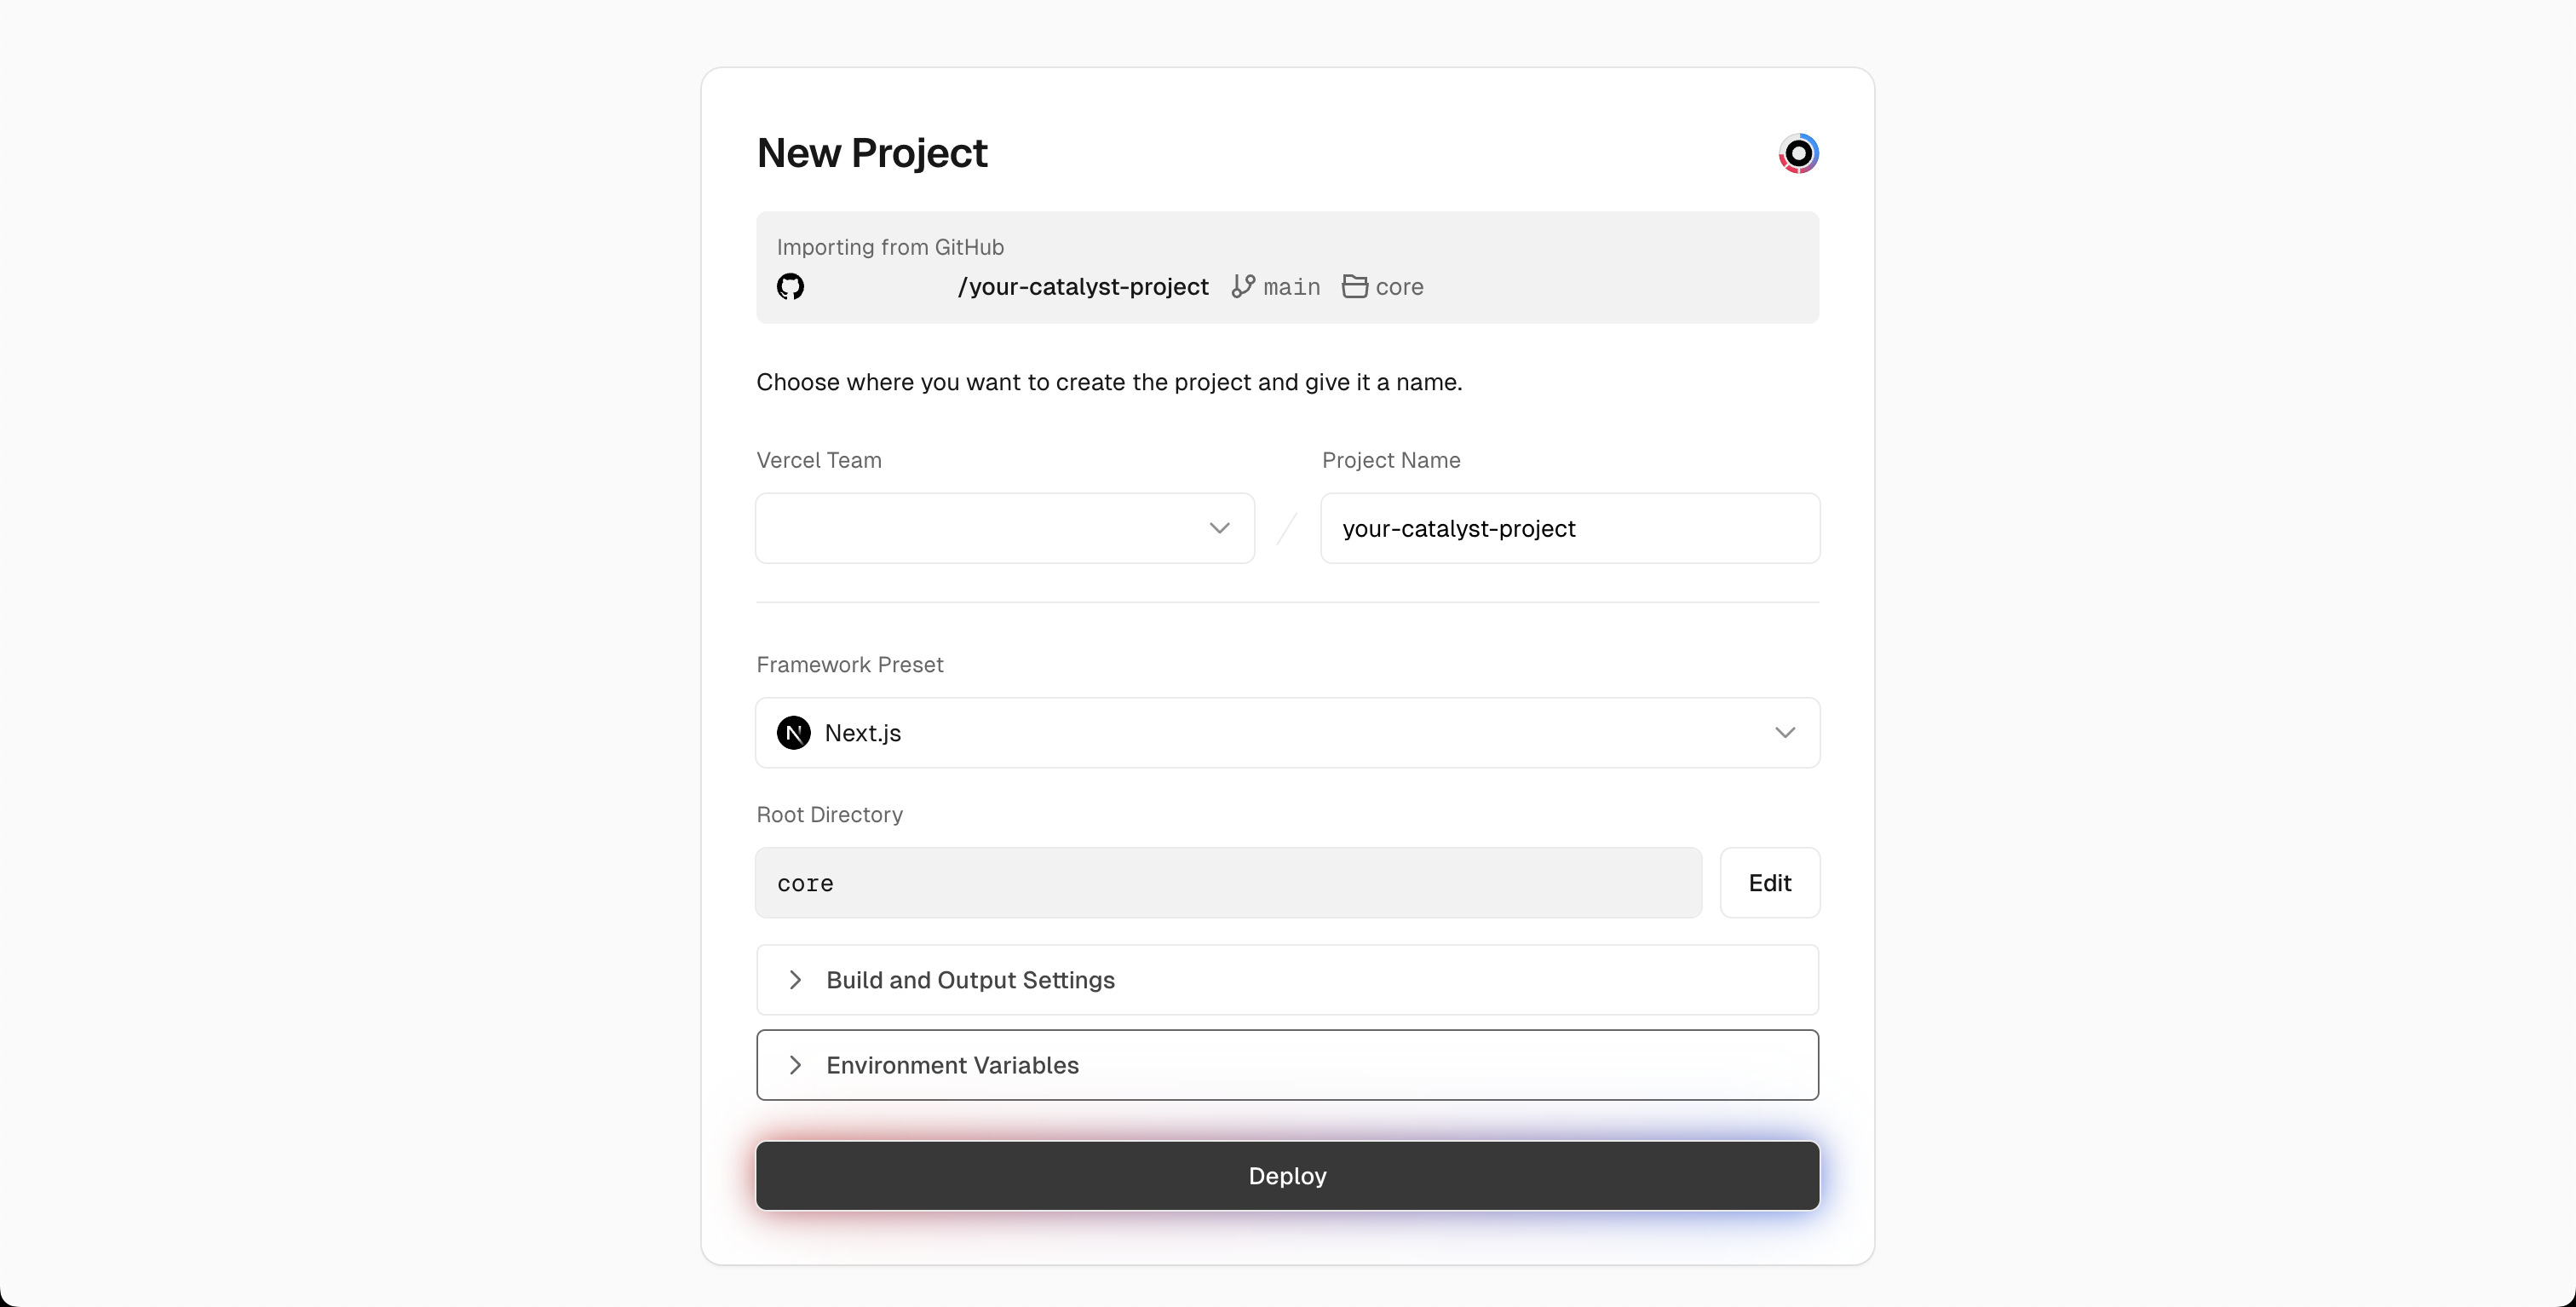
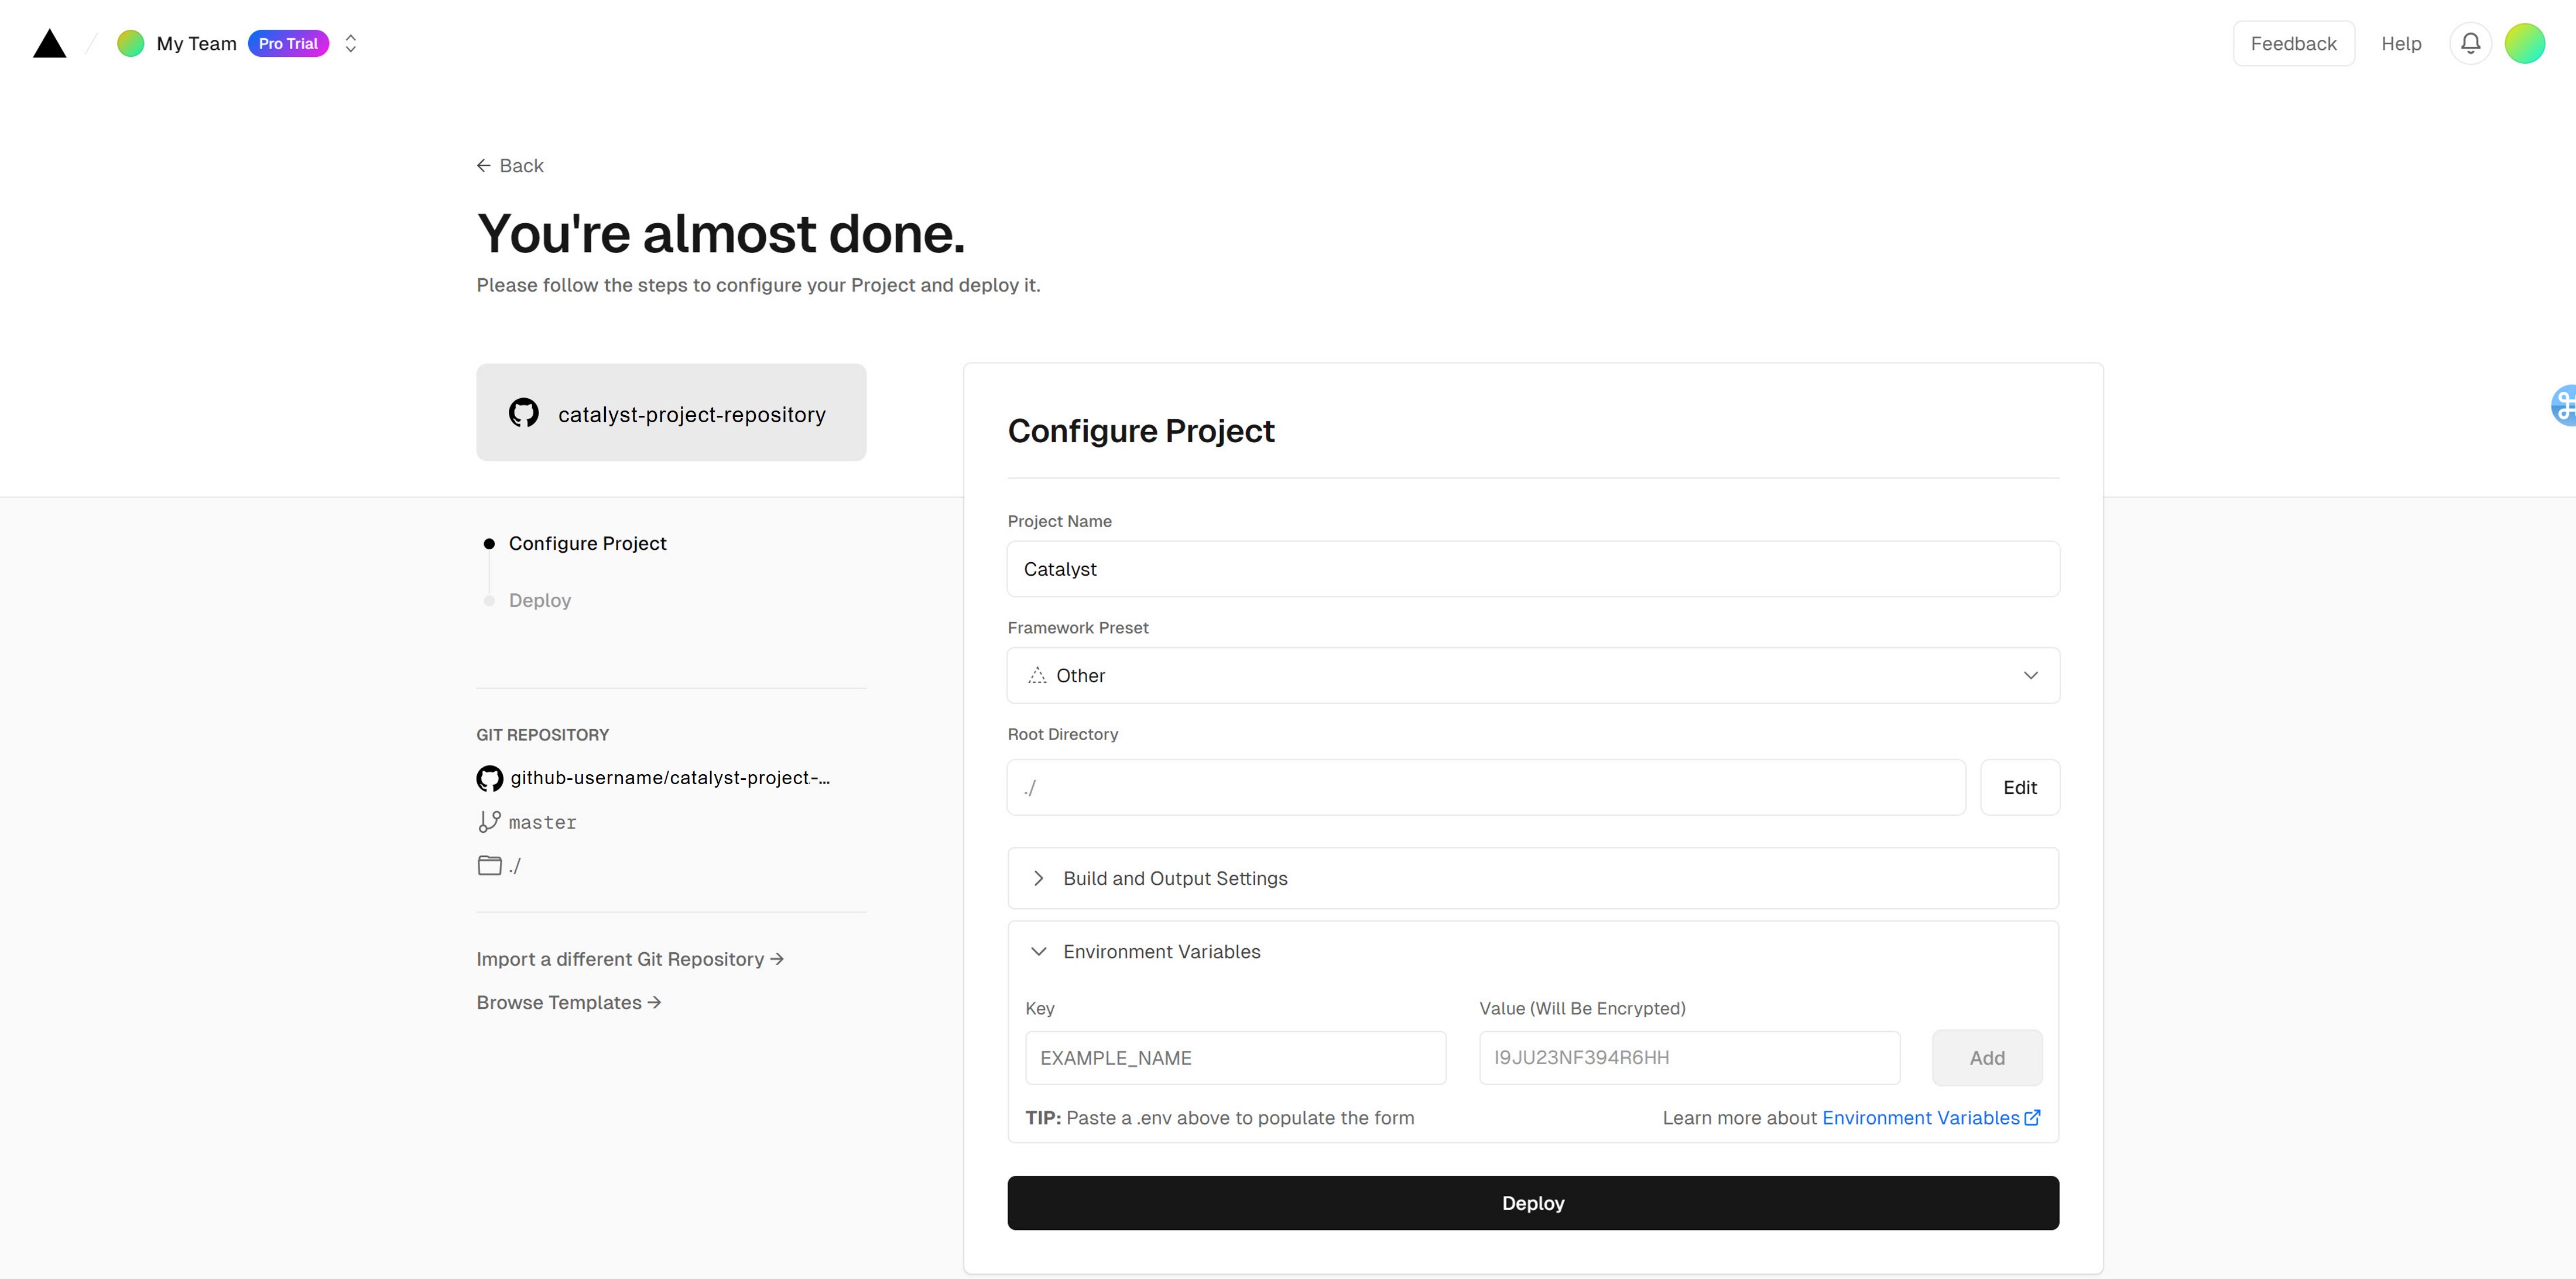
Next, you'll need to upload your environment variables. Then, click Deploy.
To learn more about deploying to Vercel, consult the Vercel deployments overview (opens in a new tab).
Using the Vercel CLI
To deploy using the Vercel CLI (opens in a new tab), first install it by running npm i -g vercel or pnpm i -g vercel.
Next, in your terminal, navigate to the root of your project. Then, run vercel to create a preview deployment or vercel --prod to create a production deployment. If this is your first time using the Vercel CLI from this project, the CLI will take you through a few prompts to connect an existing Vercel project or create a new one, and you can use the answers below to help work through those prompts:
Vercel CLI 37.8.0
? Set up and deploy “~/path/to/my-catalyst-app”? yes
? Which scope do you want to deploy to? <YOUR_VERCEL_WORKSPACE>
? Link to existing project? no
? What’s your project’s name? my-catalyst-app
? In which directory is your code located? ./core
Local settings detected in vercel.json:
Auto-detected Project Settings (Next.js):
- Build Command: next build
- Development Command: next dev --port $PORT
- Install Command: `yarn install`, `pnpm install`, `npm install`, or `bun install`
- Output Directory: Next.js default
? Want to modify these settings? no
If you are creating a new Vercel project using the CLI, you need to add the environment variables; your first build will fail if no environment variables are populated. You can add the variables one at a time using vercel env add (opens in a new tab), or sign in to vercel.com (opens in a new tab), choose your project, and add them there.
Once added, navigate back to your Vercel project, click Deployments and click Redeploy inside the ellipses dropdown menu. For more information on the Vercel CLI, consult the Vercel CLI Documentation (opens in a new tab).